Upcycling 101: Turn Trash into Treasure

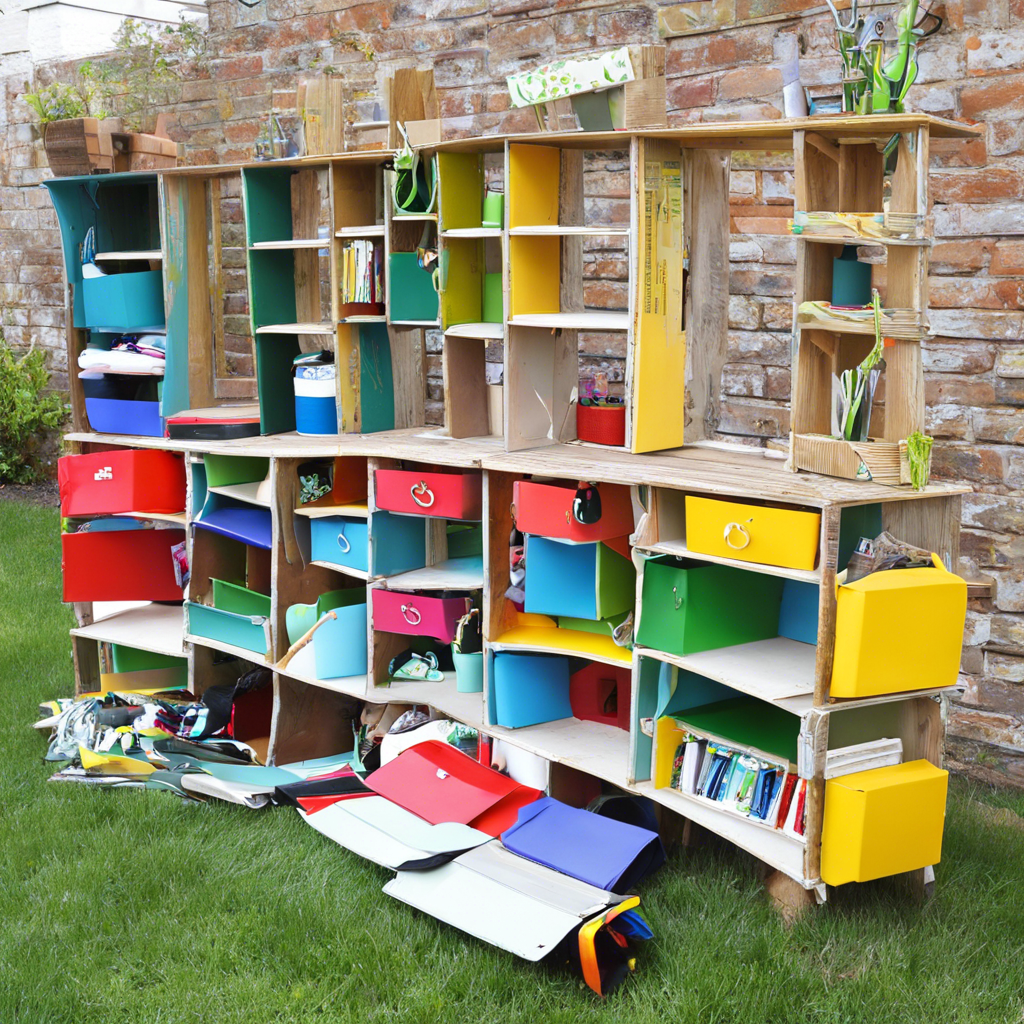
The world is waking up to the environmental crisis, and one way to reduce our impact is to embrace the trend of upcycling. Upcycling is all about transforming unwanted items or waste materials into something new and useful, giving them a second life. It’s a creative and sustainable practice that anyone can try their hand at. With a bit of imagination and some simple tools, you can turn trash into treasure and create unique, personalized items for your home or wardrobe.

One person’s trash is indeed another’s treasure. Upcycling is a growing movement that encourages us to see the potential in discarded items and gives us the power to create something truly special. It’s an eco-conscious approach to crafting and designing, reducing waste and our environmental footprint. By embracing upcycling, we can all be part of a community that values sustainability and creativity.

So, where do you start? The first step is to keep an open mind and develop a keen eye for spotting potential in everyday items. Whether it’s an old piece of furniture, a worn-out garment, or even food waste, there’s always an opportunity to transform it into something beautiful and functional. With a bit of research and experimentation, you’ll be surprised at the endless possibilities that lie within your trash can.

The internet is a treasure troove of upcycling ideas and tutorials. From YouTube videos to Pinterest boards, you can find inspiration for your next project and learn the step-by-step process to bring it to life. Upcycling communities and groups are also a great way to connect with like-minded individuals who can offer support and guidance on your upcycling journey.

When it comes to tools, upcycling doesn’t require a lot of fancy equipment. Basic items like a good pair of scissors, a glue gun, and some paintbrushes will go a long way. For more complex projects, you might need power tools, but even then, the satisfaction of creating something unique with your own two hands is well worth the investment.

One of the biggest appeals of upcycling is the opportunity to customize and personalize items to your exact taste. Whether you’re an experienced crafter or a beginner, the process of transforming something ordinary into something extraordinary is incredibly rewarding. It encourages us to embrace our creativity and think outside the box.

Cost savings is another benefit of upcycling. Instead of buying new items, you can save money by repurposing what you already have or sourcing materials cheaply from thrift stores or garage sales. This aspect of upcycling makes sustainable living more accessible and affordable for everyone.

Upcycling is a fun and eco-friendly way to breathe new life into old items. It fosters a sense of community, creativity, and environmental responsibility. So, are you ready to give it a try? Embrace your inner artist, roll up your sleeves, and get ready to transform trash into treasure! With each project, you’ll not only create something unique but also contribute to a greener and more sustainable world.

DIY Home Repairs: Fix These 5 Common Issues Yourself

Home repairs can be costly and time-consuming, but did you know that many common issues can be fixed easily without professional help? Taking on some DIY home repairs can save you money and give you a sense of accomplishment. So, roll up your sleeves and get ready to tackle these five common home repairs yourself!

First up, let’s talk about leaky faucets. That constant drip, drip, drip is not only annoying, but it’s also a waste of water and money. Fixing a leaky faucet is usually a simple matter of replacing a washer or O-ring. With a few basic tools and a trip to your local hardware store, you can have your faucet as good as new in no time.

Next, we have another common issue: running toilets. Not only is this problem a waste of water, but it can also drive up your water bill. Luckily, adjusting or replacing the tank’s float ball or fill valve often fixes this issue. These parts can be found at your local hardware store, and online tutorials can guide you through the process.

Now, let’s move on to walls. Over time, your beautiful walls are bound to get scuffed and scratched. Instead of calling a painter, you can easily fix these blemishes yourself. A little spackle and sandpaper can work wonders, smoothing over scratches and filling in any small holes left by picture frames or door handles. A fresh coat of paint can then make your walls look brand new.

Another easy fix is sticky doors. Don’t struggle with a stubborn door that won’t open or close smoothly. In most cases, the culprit is the hinge or the doorknob. Adjusting the hinge screws or realigning the doorknob and strike plate will likely solve the problem. If the door is swollen due to humidity, a careful sanding may be all that’s needed to get it swinging smoothly again.

Lastly, let’s tackle that slow or clogged drain. While it may be tempting to pour harsh chemicals down the drain, there are safer and more effective DIY methods to try first. A natural, eco-friendly solution of baking soda and vinegar can often break up the clog, and a good old-fashioned plunger can help clear the pipe.

Green Thumb Basics: Start Your First Garden

(WordPress post formatted article)

There’s something special about growing your own plants and flowers. Whether you’ve dreamed of cultivating vibrant blooms or harvesting your own vegetables, taking up gardening as a hobby is an excellent, eco-friendly, and rewarding pursuit. If you’re a novice gardener, it can be daunting to know where to begin, but fear not! With a bit of guidance and a willingness to learn, you’ll soon have a green thumb.

First, consider the space you have available. Gardening doesn’t require a large yard; even a small balcony or windowsill can accommodate pots or containers for a mini garden. Think about the type of plants you want to grow and choose a spot that receives the right amount of sunlight. Most vegetables and flowers thrive in full sun, which typically means six or more hours of direct sunlight daily.

Once you’ve selected your garden’s location, it’s time to prepare the soil. Good soil is crucial for healthy plants. Enrich your soil with compost or well-rotted manure to provide your plants with the nutrients they need to flourish. You can also add mulch, such as bark chips or straw, to help retain moisture and prevent weeds from sprouting.

When choosing what to grow, opt for plants suited to your climate and the amount of space you have. If you’re a beginner, start with easy-to-grow options like sunflowers, marigolds, or tomatoes. Consider the colors and textures you want to include, and don’t be afraid to experiment! Gardening is a fun and creative process, so you can always change things up if you’re not happy with the result.

Watering is an essential part of plant care. Ensure you provide enough water, especially during the hotter months, but be careful not to overwater, as this can cause root rot. Investing in a good watering can with a rose attachment will provide a gentle shower for your plants and help you conserve water.

Feed your plants regularly with a suitable fertilizer to encourage growth and flowering. Deadheading, or removing old flower heads, will also promote re-blooming and keep your garden looking vibrant and healthy. Lastly, be mindful of pests and diseases. Keep an eye out for any signs of damage or disease on your plants and take steps to treat them promptly.

Your first gardening endeavor doesn’t have to be perfect. Part of the fun is learning as you go and discovering what works best for your space and climate. You’ll soon find yourself filled with a sense of pride and accomplishment as you watch your garden bloom and flourish under your care.

To enhance your gardening skills, seek advice from local gardening groups or experienced gardeners in your community. They can offer valuable insights specific to your region and may even share cuttings or seeds to help you expand your garden. Additionally, there are numerous online resources and forums where you can find answers to your gardening questions and connect with fellow gardening enthusiasts.

As you embark on your gardening journey, remember to enjoy the process. Gardening is a wonderful way to connect with nature, cultivate beauty, and grow your own food. Savor the satisfaction of watching seeds transform into vibrant plants and the joy of sharing your harvest with friends and family. Happy gardening!

Now that you have the basics down, it’s time to get your hands dirty! In the paragraphs above, you’ll find the essential information you need to start your first garden. From choosing a location and preparing the soil to selecting plants and providing ongoing care, each step is crucial to your garden’s success. So, roll up your sleeves, grab your gardening tools, and get ready to watch your green thumb grow!

I hope you enjoyed reading and are now inspired to start your gardening journey. Please feel free to share this article with anyone who might benefit from it and don’t forget to leave a comment below to let us know your thoughts! Happy gardening, folks!

Budget-Friendly Bathroom Makeover Ideas

Transforming your bathroom into a relaxing and aesthetically pleasing space need not break the bank. With some creativity and smart choices, you can achieve a stunning makeover without spending a fortune. Here are some budget-friendly tips to freshen up your bathroom and give it a whole new look:

Firstly, consider a fresh coat of paint. A new color can instantly transform the space and set the tone for the overall aesthetic. Opt for a shade that complements your existing tiles and fixtures, or go bold with a trendy hue that adds a unique personality to the room. Don’t be afraid to use paint to create an accent wall, bringing a pop of color and a modern feel to the space.

Next, update your hardware and fixtures. Swapping out old, dated knobs, pulls, and faucets for new ones can make a significant impact. Look for budget-friendly options at your local hardware store or online. You can find a variety of styles and finishes to match your taste, from sleek and modern to traditional and elegant. Small changes like these can give your bathroom a whole new feel without costing a fortune.

Another easy update is to replace your shower curtain and bath mats. These are often overlooked, but they can make a substantial difference in the overall appearance of your bathroom. Opt for a stylish new curtain with a fun pattern or color, and coordinate it with matching mats to create a cohesive and intentional look. Not only will this simple change bring new life to the space, but it will also make you feel like you’ve walked into a fancy hotel every time you step into the bathroom.

Invest in new towels and display them proudly. Towels are often an afterthought, but they can be a great way to bring color and texture into the room. Look for affordable, plush options in complementary colors to create a spa-like atmosphere. Roll them up and place them in a basket or hang them neatly on stylish towel racks to give your bathroom an instant upgrade.

These are just a few ideas to get you started on your budget-friendly bathroom makeover journey. With a bit of creativity and some careful planning, you can create a beautiful and relaxing space that you’ll love. Stay tuned for the next article, where we’ll explore more affordable renovation ideas and provide step-by-step guidance to bring your dream bathroom to life!

Now, let’s delve into some additional ways to enhance your bathroom without spending a fortune:

Lighting can make a significant impact on the ambiance of your bathroom. If you have the budget, consider installing new fixtures to create a relaxing atmosphere. Opt for soft, warm lighting that flatters your skin tone and creates a spa-like feel. Sconces flanking the mirror or a stylish pendant light can add both illumination and a design element to the space. However, if you want to save money, you can achieve a similar effect with strategically placed lamps or even string lights. Play with lighting options to create the perfect mood and a whole new look.

Greenery brings life and a touch of nature into your bathroom. Add some succulents or hanging plants to create a calming and serene space. If natural light is limited, opt for low-maintenance plants that thrive in low-light conditions, such as snake plants or peace lilies. Not only do plants add visual appeal, but they also improve air quality, making your bathroom feel like an oasis. Small pops of greenery can make a big difference in the overall freshness and appeal of the space.

Create a feature wall with removable wallpaper. This is an easy way to add pattern, color, and personality to your bathroom without the commitment of traditional wallpaper. With a range of stylish and affordable options available, you can choose from bold florals to geometric designs that suit your taste. It is a great way to experiment with trends and bring your unique style into the space. The best part? When you’re ready for a change, simply peel it off and start again.

Style your vanity like a pro. Organize your products and display them neatly in stylish containers or trays. Group similar items together and utilize storage solutions such as baskets or drawers to keep the space clutter-free. Adding a few decorative touches, like a small vase of flowers or a candle, can transform your vanity into an elegant and functional space. It’s the little details that make a big difference in the overall aesthetic of your bathroom.

Lastly, don’t forget the power of a deep clean. Sometimes, a thorough cleaning can make your bathroom feel brand new. Pay attention to often-neglected areas, such as grout and shower doors. Use cleaning products that leave a fresh scent, and don’t be afraid to put some elbow grease into it. You might be surprised at how much a sparkling clean bathroom can uplift the entire space.

There you have it! With these simple and budget-friendly ideas, you’re well on your way to creating a beautiful and relaxing bathroom that you and your family will enjoy. Happy renovating!

Organize Your Kitchen: Smart Storage Solutions

Having a well-organized kitchen can make cooking and baking more enjoyable and efficient. It’s amazing how much of a difference smart storage solutions can make in maximizing your space and creating a functional and stylish kitchen. Here are some ideas to inspire you to take on that organizing project you’ve been putting off!

Start by taking inventory of your kitchen items and grouping similar items together. This will help you identify what needs to be stored and where the best place to store it might be. Invest in some high-quality, airtight containers for frequently used dry goods such as pasta, rice, and cereals. Labeling these containers clearly will make it easy to find what you need at a glance and keep your kitchen looking tidy and uniform.

Make use of vertical space by installing shelves or utilizing the walls with hanging storage solutions. This could be in the form of rails or pegboards, which are a great way to hang utensils, pots, and pans, keeping them within easy reach and creating a unique feature in your kitchen. Utilize the back of cabinet doors by attaching wire or basket organizers to store items such as cleaning products, tin foil, and plastic wrap. This creates more space inside the cabinets for other items and keeps these essentials easily accessible.

Drawers can be a black hole for kitchen gadgets and utensils, so consider utilizing drawer organizers to separate items and create designated spaces for each. This ensures you’re making the most of the space and can find what you need without rummaging. For deeper drawers, consider adding additional shelving to create more levels for storage, or even moveable organizers that can be pulled out to access items at the back.

Under-sink storage can be maximized by adding a simple tension rod to hang cleaning products and spray bottles, keeping them from toppling over and making the most of the vertical space. Make the most of your pantry by adding additional shelves and using clear containers or labels so you can easily find ingredients. Store less frequently used items, such as special occasion dinnerware or small appliances, on higher shelves, leaving everyday items within easy reach.

Utilizing these smart storage solutions will help you create a functional and organized kitchen, making meal preparation a breeze and leaving you with a sense of satisfaction and pride in your space! Whether you’re whipping up a quick meal or baking a complex dessert, an organized kitchen will make the process more enjoyable. So, what are you waiting for? It’s time to tackle that kitchen organization project!

Now, let’s move on to some specific product recommendations and hacks to really maximize your kitchen’s potential. First, consider investing in clear, stackable containers for your fridge. This will not only help you see what you have at a glance but also make the most of your refrigerator space. Look for containers with airtight lids that can stack neatly, accommodating various food types. You can also utilize fridge bins and organizers to create designated sections for different food categories, making it a breeze to find what you’re looking for.

When it comes to your pantry, uniformity is key to achieving a neat and tidy space. Transfer dry goods, snacks, and baking supplies into matching containers and clearly label them for easy identification. This not only keeps your pantry looking sleek but also ensures you can quickly replenish supplies when needed. For those with a smaller kitchen, make use of narrow spaces by investing in a slimline trolley or organizer. These can be placed in gaps between the fridge and counter to provide additional storage for spices, oils, or even tinned goods.

If you have a corner cabinet that’s difficult to access, consider installing a lazy Susan. This handy device allows you to reach items at the back of the cabinet with a simple spin, making the most of that hard-to-reach space. Another clever solution for maximizing storage is utilizing the space above your cabinets. You can add decorative baskets or boxes to store lesser-used items, such as seasonal decorations or extra serving platters, ensuring they’re out of the way but still accessible when needed.

Lastly, don’t forget about utilizing the doors of your cabinets and pantry. You can attach narrow wire racks or organizers to store items like condiments, spices, or even snacks, making the most of this often-overlooked space. With these clever storage solutions, you’ll be well on your way to a functional and organized kitchen that makes meal preparation efficient and enjoyable!

Painting Like a Pro: Tips for a Perfect Finish

Preparing surfaces, choosing the right tools, and mastering application techniques are the keys to achieving a flawless paint finish that will impress and endure. While painting may seem straightforward, a multitude of factors can impact the outcome. Here are some expert tips to ensure your next painting project delivers a perfect finish.

First and foremost, surface preparation is critical. A clean, smooth surface is essential for an even paint application. Wash the walls to remove dirt, grease, and grime, and repair any damage, filling holes and sanding down uneven areas. A properly prepared surface ensures the paint adheres evenly and creates a smooth, long-lasting finish. It is also important to use high-quality primer and paint. A good primer will seal the surface and provide a base for the paint to adhere to, ensuring the true color comes through. Opt for a primer and paint designed for the specific surface you’re working with, be it drywall, wood, or metal.

Choosing the right paint finish is also key. From flat to high-gloss, the options offer varying levels of shine and durability. Flat finishes are ideal for low-traffic areas as they tend to be more porous and difficult to clean, whereas high-gloss finishes are perfect for trim and accents due to their durability and ease of cleaning. For most rooms, an eggshell or satin finish strikes a balance between a subtle shine and washability.

Investing in quality painting tools is equally important. Cheap brushes and rollers can leave streaks and shed fibers, marring your final look. Opt for brushes with soft, flexible bristles that hold their shape and rollers with high-density, lint-free covers. For trimming, a 2- to 3-inch angled brush is ideal for cutting in straight lines, while a larger flat brush works well for broad surfaces. Roller selection depends on the texture you want and the surface you’re covering.

Proper technique also plays a critical role in achieving a professional finish. Start by cutting in the edges with a brush, then use a roller to fill in the main areas. Employ a consistent, light touch and maintain a wet edge to avoid lap marks. For the best results, work in small sections and maintain a consistent speed and pressure.

In addition to the usual rollers and brushes, consider adding some special tools to your kit. A paint sprayer, for example, can deliver a smooth, even finish on large projects, while a paint pad applicator is perfect for covering textured surfaces quickly and efficiently.

Remember to always read the paint manufacturer’s instructions and take the necessary safety precautions when preparing and painting. With the right tools, techniques, and preparation, anyone can achieve a professional-looking paint job and transform their space.

For intricate projects that require detail work, invest in a set of small art brushes. These brushes allow for precision painting around delicate features, ensuring a polished result. When tackling a multi-room project, establish a plan of action. Start with the smallest room first, allowing you to master your technique and build confidence.

Additionally, lighting plays a significant role in how paint colors appear. Before settling on a shade, observe how natural light impacts the color throughout the day. Artificial lighting, such as warm or cool bulbs, can also alter the hue, so choose your lighting carefully to ensure the color remains true to your vision.

When painting, it’s crucial to be mindful of the environment and opt for low-VOC or no-VOC paints whenever possible. These paints have lower levels of volatile organic compounds, reducing potential health risks and minimizing odors. Always dispose of paint and related materials responsibly, following local guidelines.

Lastly, don’t rush the process. Painting may be time-consuming, but taking your time ensures a high-quality, long-lasting finish. Proper preparation, careful painting, and adequate drying time are key to achieving a stunning result. Embrace the process, and you’ll be rewarded with a space that wows.

10 Easy DIY Projects to Upgrade Your Living Room

Giving your living room a refresh doesn’t have to be costly or time-consuming. With a few simple DIY projects, you can easily upgrade the space and make it feel brand new. So, whether you’re looking for a quick weekend project or wanting to tackle something more ambitious, here are ten great ideas to get you started.

A fresh coat of paint can work wonders for your living room. Consider a feature wall with a bold color or a trendy paint effect, like color blocking or stenciling. It’s a quick way to add impact and a unique style to your space. Wallpaper is also a great option, with so many designs and patterns to choose from; you can create a feature wall with a difference. From tropical prints to geometric designs, there’s a style to suit every taste.

If your living room feels a little dated, updating the lighting is an easy way to make it feel modern and fresh. Try swapping out old fixtures for something more contemporary. Pendant lights and chandeliers can create a focal point, while wall sconces add a subtle, elegant touch. You could also experiment with different bulb types and shades to create the perfect ambiance.

Storage is essential in any living room, and building your shelves is a rewarding project. You can customize them to fit your space perfectly and choose the style and material to suit your taste. Floating shelves are a great space-saving option, while built-in bookcases can add a cozy, traditional feel.

There’s nothing like a piece of custom-built furniture to elevate a space. Designing and building your own allows you to tailor it to your exact needs and style. Consider a unique media unit or a sleek console table to add a touch of luxury. You could use wood or even upcycle old furniture to create something truly one-of-a-kind.

The devil is in the detail, and switching up your living room hardware can make a surprising difference. Change out drawer pulls and cabinet handles for something more stylish and chic. It’s a small change that can instantly update the look and feel of your furniture and give it a whole new lease of life.

With a few simple DIY skills, you can transform your living room into a stylish and welcoming space. So, why not roll up your sleeves and give some of these projects a go? You’ll be surprised at what you can achieve. Happy crafting and decorating!

Now, let’s dive into the details of each project:

Project 1: Paint or Wallpaper Feature Wall:
Choose a vibrant color or an eye-catching wallpaper pattern to create an accent wall that becomes the focal point of your living room. This project is a quick way to inject personality and a sense of your unique style into the space. Whether you opt for a bold hue or an intricate design, it will instantly refresh the entire room.

Project 2: Update Lighting Fixtures:
Modernize your living room by swapping out dated light fixtures. Consider statement pieces like a geometric chandelier or industrial-style pendant lights to create a focal point. Wall-mounted lights or subtle sconces can also add a soft, ambient glow, perfect for creating a cozy atmosphere in the evenings.

Project 3: Build Custom Shelving:
Take control of your storage needs by building your own shelves. This project allows you to maximize your space efficiently. Opt for floating shelves to display your favorite books and ornaments or design a full-height bookcase for a classic look. Custom shelving not only adds functionality but also becomes a design element in the room.

Project 4: Design Your Own Furniture:
Creating your own furniture is a rewarding experience and ensures you get exactly what you want. Design a unique media console or a sleek sideboard that fits your space perfectly. You can use reclaimed wood for a rustic charm or go for a more polished look with painted MDF. The possibilities are endless!

Project 5: Upgrade Hardware:
Sometimes, it’s the little details that make a big difference. Updating the hardware on your living room cabinets and drawers is an easy and inexpensive upgrade. Swap out standard handles for something more stylish, like brass pulls or sleek, black knobs. It’s a simple way to give your furniture a modern refresh.

Project 6: Create a Gallery Wall:
Curate your favorite photos, prints, and artworks to create a stunning gallery wall. This project allows you to display your cherished memories while adding a unique design element to your living room. Mix and match frames in different sizes and styles for an eclectic look, or go for a more uniform grid layout for a modern feel.

Project 7: Add a Statement Mirror:
Incorporate a statement mirror to create the illusion of space and bring in more light. Large, ornate mirrors can act as a beautiful focal point, while unusual shapes and designs will become a talking point for guests. Lean them against the wall or hang them to create a sense of depth and openness in your living room.

Project 8: Upcycle Old Furniture:
Give new life to old furniture with a simple upcycling project. Sand down and repaint a vintage side table or repurpose an old dresser into a unique TV stand. You can also update the hardware to give it a modern twist. Upcycling is a sustainable and cost-effective way to get custom-look furniture.

Project 9: Bring the Outdoors In:
Incorporate nature into your living room with a DIY plant wall or hanging planters. This project adds a lively and fresh touch to your space. Choose easy-care plants like succulents or trailing vines for a natural, organic feel. You can also display potted herbs for a mini indoor garden.

Project 10: DIY Rug or Wall Hanging:
Get crafty and create your own rug or wall hanging to add texture and color to your living room. Try macrame or weaving to design a unique piece of art that doubles as a statement decor item. You can also experiment with different fibers and colors to create a one-of-a-kind rug that ties the entire room together.

There you have it! Ten fantastic DIY projects to upgrade your living room. Whether you tackle one or try them all, these projects will surely add a personal touch to your space and keep your creative juices flowing. So, get your tools ready and give your living room the refresh it deserves!